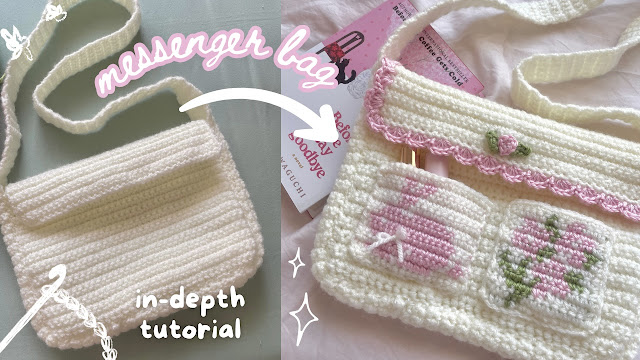
Hi everyone! Here's a short step-by-step guide for your reference based on my in-depth youtube tutorial on how to crochet your dream messenger bag with pockets.
Step 1: pick your yarn and hook size. I recommend using a 4, 4.5, or 5 mm hook with an acrylic or cotton yarn (medium weight/size 4) to make sturdy bags.
Step 2: pick a pixel grid from Pinterest (my board has 100+ free pixel grids to choose from!) or create your own with the Charts tool in the My Row Counter app...
To make crocheting pixel grids and other projects easier, I recommend downloading the My Row Counter app, which is a must-have app for crocheters and knitters! I love using the app to create my own pixel grids from scratch and keeping track of my rows with the highlighter tool to easily find the steps I'm working on.
Download the My Row Counter app on iOS and Android for free or visit the website!
These are the pixel grids I used for my pocket (made with the My Row Counter app!)
Step 3: crochet the pixel grid pockets with the carry-on technique (recommended for 2-3 colors) or the floating yarn technique (recommended for 2+ colors and the yarn doesn't show in between the stitches but the back side is messy)
Step 4: crochet these 3 pieces for the bag...
1. Front panel
2. Back panel + extra rows for the flap
3. Strap (has to be long enough to wrap around the sides of the bag too!)
To make these pieces, follow the same steps but adjust the number of stitches/rows.
Start with a slip knot then chain the length you want. Chain 1 more (this is a turning chain, it doesn't count as a stitch). Skip the turning chain then insert 1 single crochet into every chain to make the 1st row.
To make a new row: chain 1, turn your work, insert 1 single crochet into every stitch
Crochet rows of single crochet until the piece is the size you want :)
Step 5: sew the pieces together. First, sew the sides of the front panel to one side of the strap. Then, sew the back panel onto the other side of the strap. Finally, sew the pixel grid pockets onto the bottom of the front panel.
Optional Step 6: crochet a shell border around the edges of the flap. Repeat this pattern: 5 double crochets in the same space, skip a space, slip stitch.


No comments:
Post a Comment