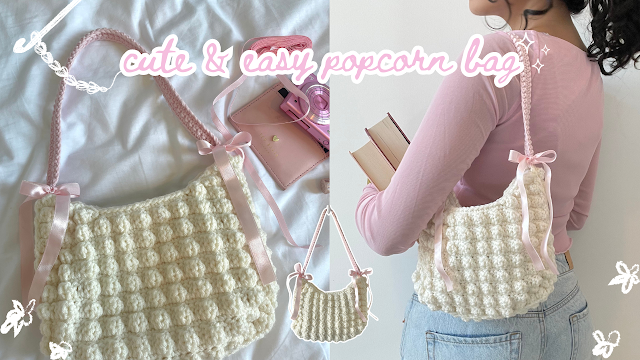
Here are the measurements & other specifications of my bag if you want to make the same size as mine:
Yarn - around 150 grams of circulo classic pull / Hook size - 4 mm
Back & front piece - 23 cm width / 16 cm length
Side & bottom piece - 3 cm width / 53 cm length
Strap - 1.5 cm width / 43 cm length
Abbreviations (US terms):
sc - single crochet / dc - double crochet / tc - triple crochet
Step 1: crochet the front & back piece following the same steps
Foundation chain - make a slip knot & chain in multiples of 3 until you have the desired width (I chained 33 for my bag)
Row 1 - chain 1 (this is a turning chain that doesn't count as a stitch) and turn your work, skip the turning chain, sc into every chain
Row 2 - chain 1 and turn your work, dc into the 1st stitch, repeat this pattern until the end of the row *puff stitch (3 half completed tc), 2 dc*, 1 dc into the last stitch to end the row
Row 3 onwards - repeat the steps for row 1 (sc) and row 2 (puff stitch + 2 dc) until the piece is the desired length (I did 17 rows for my bag)
Curved edge - decrease the number of puff stitches in each row (I did 3 then 2 then 1), slip stitch along the edge and repeat on the other side
Step 2: piece that runs along the sides and bottom
Foundation chain - make a slip knot & chain in multiples of 3 until you have the desired width (I chained 6 for my bag)
Row 1 - chain 1 (this is a turning chain that doesn't count as a stitch) and turn your work, skip the turning chain, sc into every chain
Row 2 - chain 1 and turn your work, dc into the 1st stitch, repeat this pattern until the end of the row *puff stitch (3 half completed tc), 2 dc*, 1 dc into the last stitch to end the row
Row 3 onwards - repeat the steps for row 1 (sc) and row 2 (puff stitch + 2 dc) until the piece is the desired length (I did 17 rows for my bag)
Attach this piece to the front and back pieces by slip stitching along the edges (insert your hook through both pieces to join them)
Step 3: strap
Foundation chain - attach your yarn with a knot on one side of the bag then chain the length you want for the strap, slip stitch onto the other side
Row 1 onwards- slip stitch into the next stitch, sc into every chain, slip stitch onto the other side
Crochet rows of sc until the strap is the desired width (I did 3 rows for my bag)
connect with me and share your work in our community by tagging me on instagram & tiktok @mahumcrochets - lots of love as always,


No comments:
Post a Comment