

Hi everyone! Here's a cute and easy tote bag tutorial that follows a repetitive pattern, requires minimal effort to create alternating rows, and is easily put together.
Here are a few things to keep in mind while using this pattern:
The heart granny square is not my original idea! With this pattern, I'm only taking credit for the way in which I crocheted the heart granny square into a tote bag. All the steps I took are either mentioned explicitly or linked to a specific technique or youtube tutorial I used. To make this, you should be experienced with some basic stitches and know how granny squares work. That being said, I can't wait to see what you come up with! Please tag me in your creations (or send me a picture!) and feel free to DM me on Instagram (@mahumcrochets) if you have any questions.
Materials & Terminology:
Part 1: Crocheting a heart granny square
Crochet a heart following this youtube tutorial: crochet heart granny square tutorial. Once you're done crocheting the heart, you can either keep following the video (don't forget to refer back to this pattern for the steps that come afterward) to make the granny square or follow the pattern below.

Follow this pattern as you go around the stitches of the heart (don't skip any stitch):
Sc, hdc, dc, tc, ch 2 (this is the 1st gap), dc, hdc, sc, sc, sc, sc, ch 2 (this is the 2nd gap), sc, sc, sc, sc, hdc, sc, sc, sc, sc, ch 2 (this is the 3rd gap), sc, sc, sc, sc, hdc, dc, ch 2 (this is the 4th gap), tc, dc, hdc, sc into the stitch where you attached the yarn, ss into the next stitch.
Border 2 (C1): After you ss, ch 3 and in the same stitch and insert 2 dc (the ch 3 counts as your first dc so there are basically 3 dc in the stitch), ch 1, now make a CORNER by doing the steps in asterisks in the ch 2 gap closest to you: *3 dc into the ch 2 gap, ch 2, 3 dc into the same ch 2 gap*, ch 1, 3 dc into the 3rd stitch from the ch 2 gap, ch 1, CORNER *3 dc into the ch 2 gap, ch 2, 3 dc into the same ch 2 gap*, ch 1, 3 dc into the 3rd stitch from the ch 2 gap, ch 1, CORNER *3 dc into the ch 2 gap, ch 2, 3 dc into the same ch 2 gap*, ch 1, 3 dc into the 3rd stitch from the ch 2 gap, ch 1, CORNER *3 dc into the ch 2 gap, ch 2, 3 dc into the same ch 2 gap*, ch 1, ss into the top of the ch 3 you made at the start, ch 1 to fasten off and cut.
Border 3 (C2): Attach the new color with a knot into one of the ch 2 gaps made in border 2. Ch 3 and insert 2 dc in the same stitch (the ch 3 counts as your first dc so there are basically 3 dc in the stitch where you attached the yarn), ch 1. Now you'll be working into the gaps made either by ch 1 or ch 2 in border 2. Repeat *3 dc, ch 1* in every chain 1 gap. When you reach every chain 2 gap, repeat *3 dc, ch 2, 3 dc* to make a corner. Do this all around the square. When you reach the same chain 2 gap where you attached the yarn, insert 3 dc again, ch 2, ss into the top of the ch 3, and ch 1 to fasten off and cut the yarn to tighten.
Borders 4 & 5 (C1): Attach the new color with a knot into one of the ch 2 gaps made in border 2. Ch 3 and insert 2 dc in the same stitch (the ch 3 counts as your first dc so there are basically 3 dc in the stitch where you attached the yarn), ch 1. Repeat *3 dc, ch 1* in every ch 1 gap. When you reach every ch 2 gap, repeat *3 dc, ch 2, 3 dc* to make a corner. Do this all around the square.
.png)
Continue adding the borders by alternating between 1 row of C2 (steps from border 3) and 2 rows of C1 (steps from borders 4 & 5). Crochet 2 squares of the same size.
Once the squares are as big as you want, attach the alternating color in the ch 2 gap in the top corner, repeat *3 dc, ch 1* till the end. This will give your bag a more rectangular, tote bag-like shape.

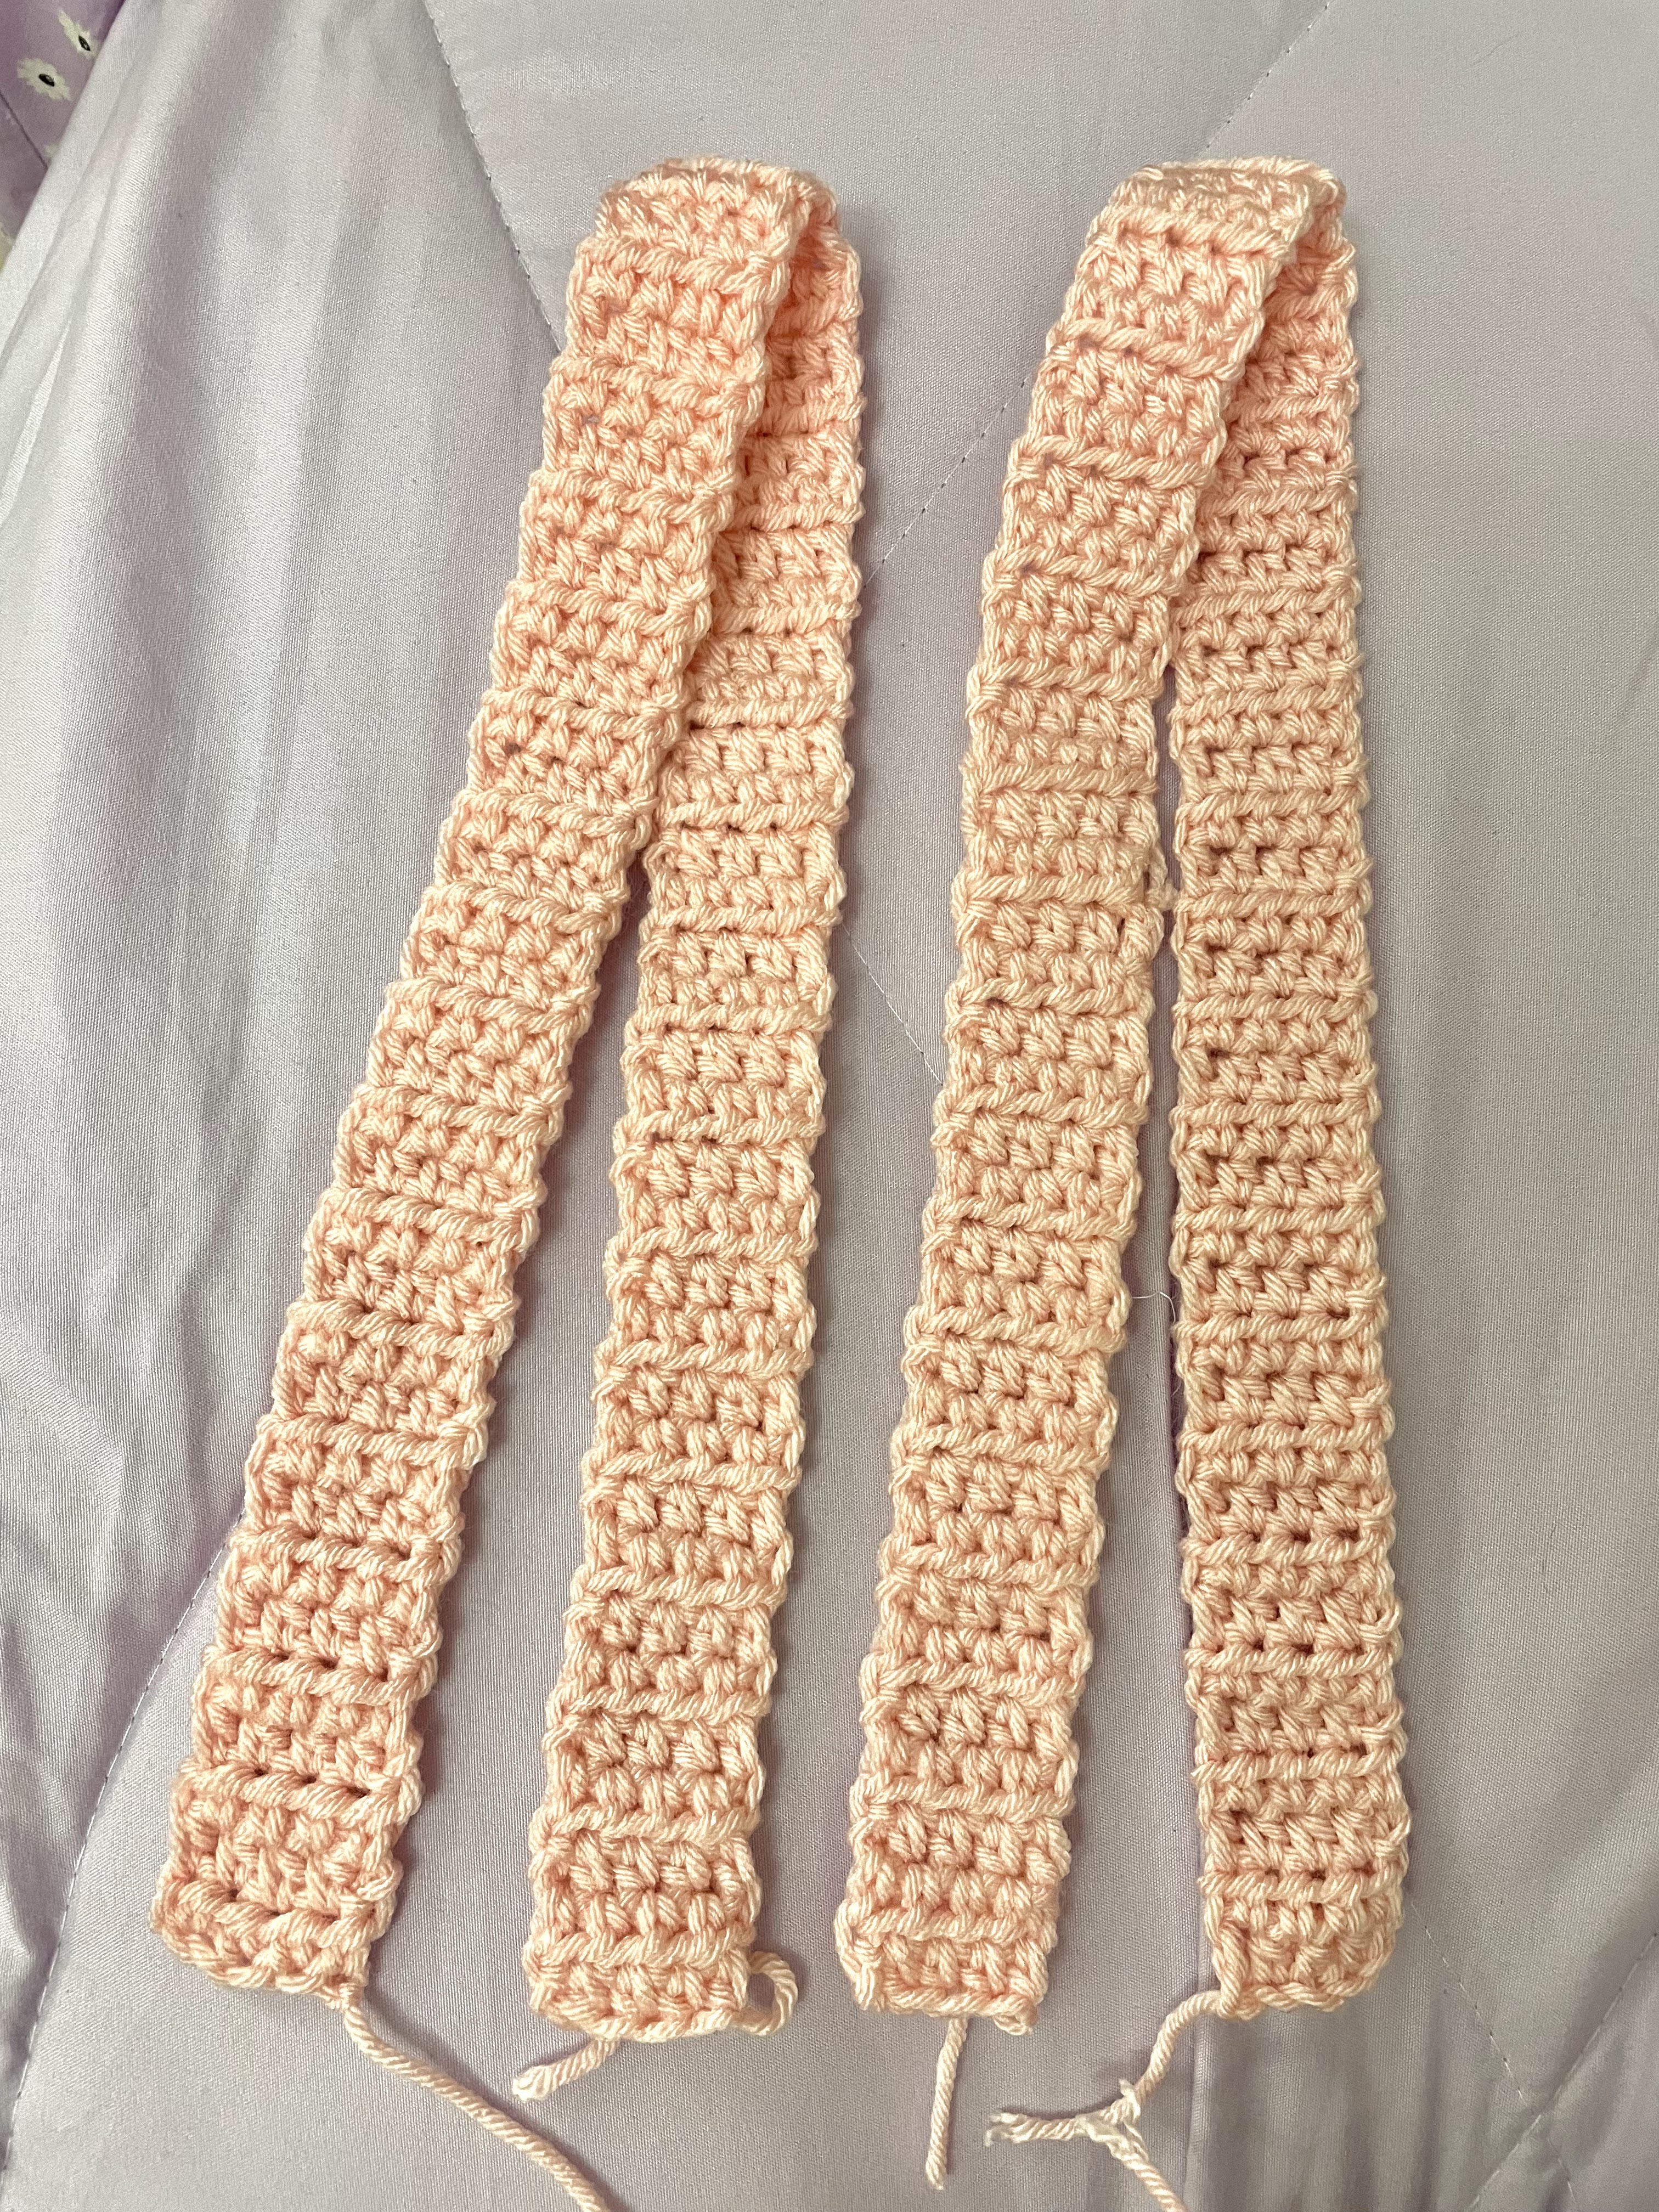
Part 2: Crocheting the straps
For the straps, start with a slip knot, ch 6 (or more if you want your strap to be wider), sc into the 2nd ch from your hook, sc in every stitch till the end (total 5 sc), ch 1, turn your work, sc into the 2nd ch from your hook, sc in every stitch till the end (total 5 sc again), continue crocheting rows of sc until it's the length you want for the strap.
Make 2 straps of the same width and length.
 Part 3: Putting the pieces together

This part is up to personal preference! You can sew the 2 sides of the bag and the straps together or crochet with ss/sc (I prefer crocheting).
To attach the straps to the squares, I used ss. Attach the yarn with a knot on the wrong side of your square (the side our loose ends face) then ss the stitches of the strap and square together.


No comments:
Post a Comment