
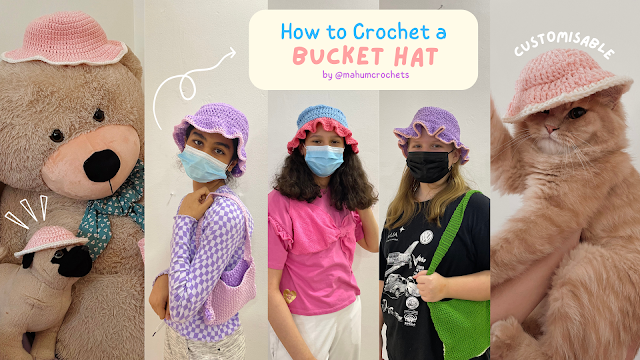
 Hi everyone! With this pattern, you can crochet yourself or your pets (or stuffed animals!) a bucket hat with a really cute frilly trim.

A note on the pattern for beginners:
This summer, I had the opportunity to teach an in-person crochet course to a group of lovely girls at Wild About Art Co studio in Bahrain. All of them were complete beginners when I taught them how to make this bucket hat, so if you're a beginner, you can make this too. You can see how their hats turned out in the picture above! Using what I learned from teaching them, I adjusted this pattern to make it even easier. You do not need to know how to make or work with a magic ring! I understand how confusing and frustrating magic rings can be for beginners, that's why I've included an easier alternative for which you just need to chain and slip stitch for. I've also included extra commentary and tried to explain things in as much detail as I can, I hope that helps you create this bucket hat and I'm so glad that I get to be a part of your crochet journey!
 Here are a few things to keep in mind while using this pattern:

To make this, you should know how to make a slip knot, chain, double crochet, and slip stitch. Apart from that, I have included step-by-step instructions for crocheting in a round and how to increase stitches. That being said, I can't wait to see what you come up with! Please tag me in your creations (or send me a picture!) and feel free to DM me on Instagram (@mahumcrochets) if you have any questions.
To make this, you should know how to make a slip knot, chain, double crochet, and slip stitch. Apart from that, I have included step-by-step instructions for crocheting in a round and how to increase stitches. That being said, I can't wait to see what you come up with! Please tag me in your creations (or send me a picture!) and feel free to DM me on Instagram (@mahumcrochets) if you have any questions.
Materials & Terminology:
I used a 4.5 mm hook and 2 yarn colors appropriate for that hook size. Abbreviations: CH - chain, DC - double crochet, SS - slip stitch, increase - insert 2 stitches into the same stitch (explained further in the pattern too).
 Part 1: The crown (top of the bucket hat)
Round 1 (total 10 stitches) - [if you know how to make a magic ring, please skip the steps in pink and instead just make a magic ring] start by making a slip knot and ch 5, ss into the first ch that you made (this will make a circle in between your chains, you can use this method as a substitute for magic ring), ch 2 and insert 10 dc into your circle, insert the hook into the top of the ch 2 you made at the beginning and ss to end the round.
Round 2 (total 20 stitches) - start the next round with ch 2, from now on you're going to be working into the dc stitches made in the previous rounds, insert 2 dc into the same stitch for every stitch around the round (inserting 2 stitches into the same stitch is called an increase), ss into the top of the ch 2 to end the round.
Round 3 (total 30 stitches) - start the next round with ch 2, repeat the pattern in asterisks all around the round * dc, increase (for beginners: insert 2 dc into the same stitch)*, ss into the top of the ch 2 to end the round.
Round 4 (total 40 stitches) - start the next round with ch 2, repeat the pattern in asterisks all around the round * dc, dc, increase*, ss into the top of the ch 2 to end the round.
Round 5 (total 50 stitches) - start the next round with ch 2, repeat the pattern in asterisks all around the round * dc, dc, dc, increase*, ss into the top of the ch 2 to end the round.
TO CUSTOMISE THE SIZE: keep doing rounds until the top of your bucket hat is as big as your head (or your pet's or whoever you're making it for!). As you continue doing the rounds for the top part, add 1 more dc to the pattern in asterisks before your increase each time. So for example, in round 6, you would do *dc, dc, dc, dc, increase*. Don't forget to ch 2 before you start your next round and ss into the top of the ch 2 to end each round. For reference, my students and I did 6-8 rounds for our hats + I did 3 rounds for my kitten's hat.
Part 2: The body
For the body, you don't have to do any increases in the rounds. Start each round with a ch 2, insert 1 dc into every stitch around the round, end with a ss into the top of the ch 2. Do as many rounds as needed to fit your head.
 Part 3: The frilly brim & other customizations
Round 1: after finishing the rounds for the body of the hat, start the next round with a ch 2, insert 1 dc into the BACK LOOPS only of every stitch around the round, end the round with a ss into the top of the ch 2. Crocheting in the back loops makes the frill part of your hat curve outwards!
For the next rounds, we will follow the same technique as the crown of the hat.
Round 2: start with a ch2, repeat the pattern in asterisks till the end of the round *dc, dc, increase*, ss to end the round.
Round 3 onwards: start the rounds with a ch 2, as you continue doing the rounds, add 1 more dc to the pattern in asterisks before your increase each time. For example, in round 3 the pattern will be *dc, dc, dc, increase*, end with a ss into the top of the ch 2.
CUSTOMIZATIONS: to create a border around your hat - attach a different colored yarn into any stitch at the brim with a knot, ch 1 and insert 1 single crochet into every stitch around the brim. if you want a thicker border, ch 2 and insert 1 dc into every stitch instead. To end the border, ss into the first ch you made and ch 1 or 2 to fasten off and cut. Alternatively, you could also make the frill section of the hat a completely different color (like the blue/pink hat shown in the cover picture above). To do that, fasten off the color you were using for the body first, then attach the different colored yarn into any stitch before you start the frill part!

Round 1 (total 10 stitches) - [if you know how to make a magic ring, please skip the steps in pink and instead just make a magic ring] start by making a slip knot and ch 5, ss into the first ch that you made (this will make a circle in between your chains, you can use this method as a substitute for magic ring), ch 2 and insert 10 dc into your circle, insert the hook into the top of the ch 2 you made at the beginning and ss to end the round.
Round 2 (total 20 stitches) - start the next round with ch 2, from now on you're going to be working into the dc stitches made in the previous rounds, insert 2 dc into the same stitch for every stitch around the round (inserting 2 stitches into the same stitch is called an increase), ss into the top of the ch 2 to end the round.
Round 3 (total 30 stitches) - start the next round with ch 2, repeat the pattern in asterisks all around the round * dc, increase (for beginners: insert 2 dc into the same stitch)*, ss into the top of the ch 2 to end the round.
Round 4 (total 40 stitches) - start the next round with ch 2, repeat the pattern in asterisks all around the round * dc, dc, increase*, ss into the top of the ch 2 to end the round.
Round 5 (total 50 stitches) - start the next round with ch 2, repeat the pattern in asterisks all around the round * dc, dc, dc, increase*, ss into the top of the ch 2 to end the round.
TO CUSTOMISE THE SIZE: keep doing rounds until the top of your bucket hat is as big as your head (or your pet's or whoever you're making it for!). As you continue doing the rounds for the top part, add 1 more dc to the pattern in asterisks before your increase each time. So for example, in round 6, you would do *dc, dc, dc, dc, increase*. Don't forget to ch 2 before you start your next round and ss into the top of the ch 2 to end each round. For reference, my students and I did 6-8 rounds for our hats + I did 3 rounds for my kitten's hat.
Part 2: The body
For the body, you don't have to do any increases in the rounds. Start each round with a ch 2, insert 1 dc into every stitch around the round, end with a ss into the top of the ch 2. Do as many rounds as needed to fit your head.

Round 1: after finishing the rounds for the body of the hat, start the next round with a ch 2, insert 1 dc into the BACK LOOPS only of every stitch around the round, end the round with a ss into the top of the ch 2. Crocheting in the back loops makes the frill part of your hat curve outwards!
For the next rounds, we will follow the same technique as the crown of the hat.
Round 2: start with a ch2, repeat the pattern in asterisks till the end of the round *dc, dc, increase*, ss to end the round.
Round 3 onwards: start the rounds with a ch 2, as you continue doing the rounds, add 1 more dc to the pattern in asterisks before your increase each time. For example, in round 3 the pattern will be *dc, dc, dc, increase*, end with a ss into the top of the ch 2.
CUSTOMIZATIONS: to create a border around your hat - attach a different colored yarn into any stitch at the brim with a knot, ch 1 and insert 1 single crochet into every stitch around the brim. if you want a thicker border, ch 2 and insert 1 dc into every stitch instead. To end the border, ss into the first ch you made and ch 1 or 2 to fasten off and cut. Alternatively, you could also make the frill section of the hat a completely different color (like the blue/pink hat shown in the cover picture above). To do that, fasten off the color you were using for the body first, then attach the different colored yarn into any stitch before you start the frill part!


